Why Amaranth Microgreens?
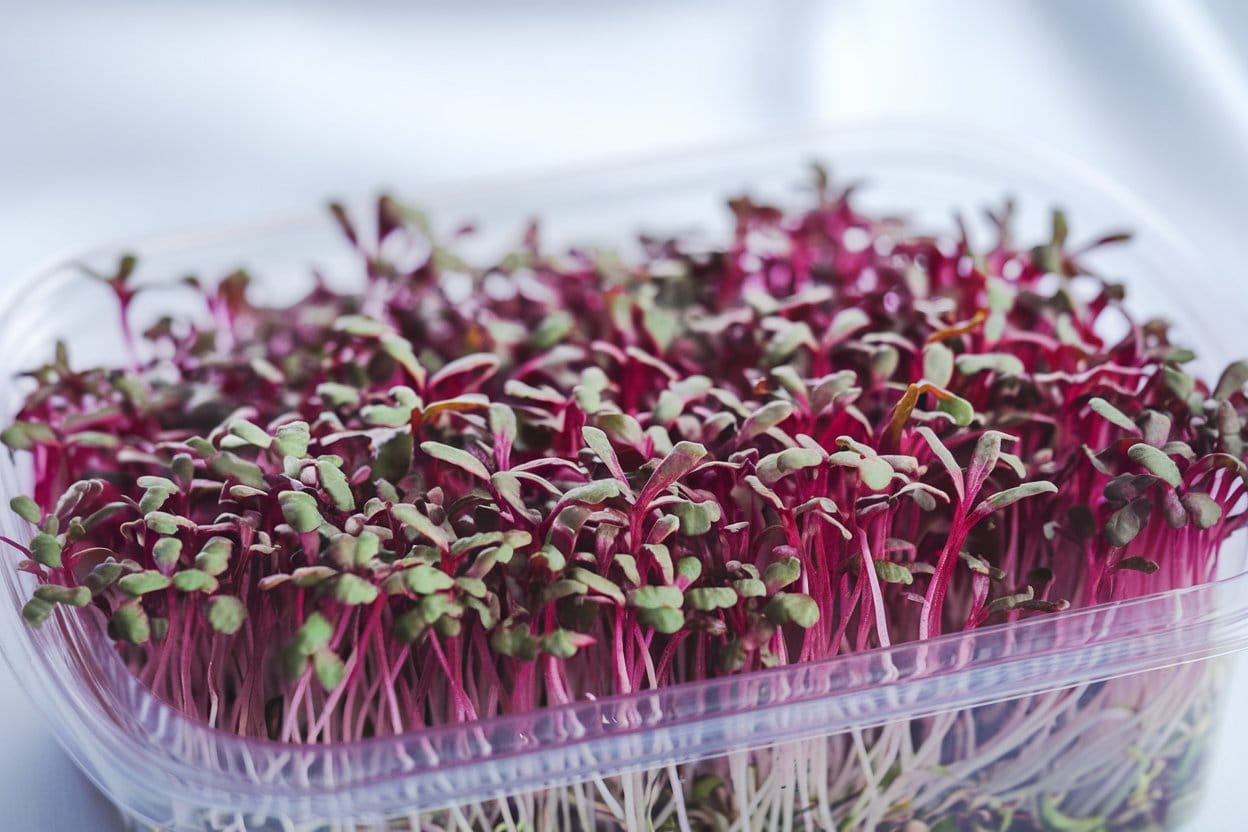
Amaranth microgreens are little nutrient powerhouses that can enhance any meal, both visually and in taste. These delicate, colorful leaves offer numerous health benefits, from high levels of vitamins, minerals, and antioxidants to a lightly earthy taste with a hint of nuttiness. For anyone seeking a nutrient-dense and easy-to-grow addition to salads, sandwiches, or smoothies, amaranth microgreens are a perfect choice. This guide provides all the information you need to successfully grow amaranth microgreens hydroponically – from selecting varieties to harvesting!
The Best Amaranth Varieties for Microgreens
When cultivating amaranth as microgreens, the variety you choose plays an important role. There are many varieties, each differing in color, germination rate, and flavor. Here are some top choices:
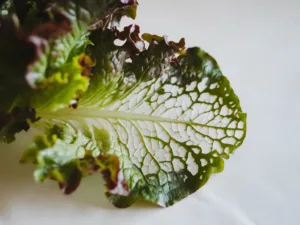
- Red Amaranth (Amaranthus tricolor ‘Red Garnet’): Known for its deep red color, this variety adds a vibrant touch to any dish. It grows quickly and has a mild, earthy flavor.
- Green Amaranth (Amaranthus viridis): Ideal for those who prefer a milder taste, this variety is robust and has a high germination rate, making it a great choice for beginners.
- Amaranth ‘Oeschberg’: With its dark purple leaves, this variety offers an intense flavor and impressive visual appeal. While it can be a bit more challenging to grow, it rewards with a rich harvest.
- Amaranth ‘Red Army’: Another red variety, this one features bright stems and leaves. It is known for its uniform germination and rapid growth.
Choosing the right variety depends on your personal taste and growing goals. For a colorful mix, try combining different varieties for variety.
The Ideal Hydroponic System for Amaranth Microgreens
Amaranth microgreens have unique requirements that limit the use of conventional hydroponic systems. Unlike many other plants that thrive in deep systems like deep-water culture or NFT, amaranth microgreens prefer a shallower cultivation method due to their dense growth and short growth cycle.
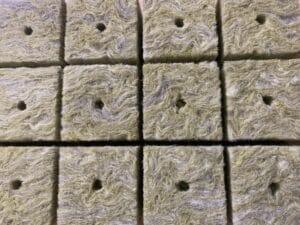
The best way to grow amaranth microgreens hydroponically is by using substrate mats in shallow growing trays. Substrate mats, like coconut fiber or hemp mats, provide an ideal base to anchor the seeds and ensure even moisture distribution. Shallow trays filled with a nutrient solution keep the roots consistently moist without causing waterlogging.
Successfully Growing Amaranth Microgreens: Step-by-Step
Growing amaranth microgreens is a simple and rewarding process, perfect for beginners and experienced hydroponic gardeners alike. Follow these step-by-step instructions to ensure your amaranth microgreens grow healthy and strong:
- Prepare the growing mat: Choose a quality substrate mat, such as coconut fiber or hemp, and cut it to fit your growing tray. Place the mat in the tray and thoroughly moisten it until fully saturated.
- Sow the seeds: Evenly distribute the amaranth seeds across the substrate mat. Avoid overcrowding the seeds to promote good airflow and prevent mold.
- Moisture and light: Cover the seeds with a light cloth or plastic cover to create a humid environment that encourages germination. Once the seeds have germinated (typically after 2-3 days), remove the cover and place the tray under a grow light. LED lights with a full spectrum are ideal for promoting strong, healthy growth.
- Care during growth: Keep the substrate mat consistently moist but avoid waterlogging. Depending on light intensity and temperature, you may need to mist the mat once or twice a day.
- Harvest: After about 7 to 14 days, your amaranth microgreens are ready to harvest. Simply cut them just above the substrate mat and enjoy fresh.
What’s the Best Substrate for Amaranth Microgreens?
The right substrate is essential for successfully growing amaranth microgreens. Generally, coconut fiber mats and hemp mats are the best options for this purpose. Both substrates offer excellent aeration, water retention, and nutrient delivery.
- Coconut fiber mats: Made from natural coconut fibers, these mats are biodegradable. They offer excellent water retention and a stable structure that allows roots to anchor well. Coconut fiber mats are especially suited for beginners as they are less prone to mold growth.
- Hemp mats: Another environmentally friendly option, hemp mats offer similar benefits to coconut fiber mats but are slightly coarser and drain faster. This can be advantageous in very humid environments or at high temperatures to prevent mold formation.
The choice of substrate depends on your growing environment and personal preferences. Both options provide a solid foundation for healthy and productive amaranth microgreens.
The Right Temperature and Humidity for Amaranth Microgreens
Amaranth microgreens thrive in a temperate environment with an average temperature of around 20-24°C (68-75°F). Too high a temperature can increase the risk of mold, while too low a temperature can slow growth. The air humidity should be moderate – ideally between 50-60%. A simple moisture meter can help you monitor these levels and adjust as necessary.
Lighting Needs: How Much and What Spectrum for Amaranth Microgreens?
Light is one of the most important factors for healthy amaranth microgreen growth. They need around 12-16 hours of light per day. A full spectrum of light, provided by LED grow lights, is ideal for promoting the best growth. Ensure that the lights are positioned approximately 30-45 cm (12-18 inches) above the plants for even lighting.
pH and EC Values for Amaranth Microgreens – What’s Optimal?
For amaranth microgreens, the optimal pH level is between 6.0 and 6.5. This range ensures nutrients in the solution are readily available and easily absorbed by the plants. The electrical conductivity (EC) should be between 0.8 and 1.2 mS/cm, as microgreens generally require fewer nutrients. A simple pH and EC meter is an invaluable tool for regularly monitoring these levels and making adjustments as necessary.
Fertilizers for Amaranth Microgreens – Less is More!
Unlike many other plants, amaranth microgreens require very little fertilizer. Since they have a short growing period, most of the necessary nutrients are already stored in the seeds. A light nutrient solution added once at the beginning of growth is usually sufficient. Avoid nitrogen-based fertilizers, as they can promote mold growth.
Harvesting Time and Method for Amaranth Microgreens
Amaranth microgreens are generally ready for harvest after 7 to 14 days, depending on light and temperature conditions. The optimal time is when the plants develop the first true leaf pair. Cut the microgreens just above the substrate mat with clean scissors or a sharp knife. For maximum freshness, use them immediately after harvest or store them in the refrigerator.
Preventing Diseases and Pests on Amaranth Microgreens
Like all plants, amaranth microgreens are susceptible to diseases and pests. The most common issues include mold, fungal infections, and aphids. Good air circulation and proper watering are essential for preventing mold. If pests like aphids appear, it’s best to remove affected plants immediately and maintain a clean environment.
Special Tips for Successful Amaranth Microgreens
- Change the substrate mat regularly: Use fresh substrate mats to avoid mold growth and disease transmission.
- Monitor light carefully: Too little light leads to thin, weak microgreens, while too much can burn them.
- Experiment with different varieties: Mix different amaranth varieties to enjoy a range of colors and flavors.
Start Growing Amaranth Microgreens Today!
Amaranth microgreens are a fantastic way to enhance your diet while growing a healthy and nutrient-rich ingredient yourself. With the right varieties, ideal growing systems, and proper care, you can soon harvest fresh, delicious microgreens. So, what are you waiting for? Start today and enjoy the benefits of your own amaranth microgreens!